Difference between revisions of "RaspberryPi"
| (84 intermediate revisions by 2 users not shown) | |||
| Line 4: | Line 4: | ||
|description=Building a Ravencoin full node on Raspberry Pi | |description=Building a Ravencoin full node on Raspberry Pi | ||
}} | }} | ||
| + | <div class="floatright"><img src="https://i.gyazo.com/3d630d1f995efdb8ffdd04865a6a12c0.png"><br>By [@]Pathfinder#0001</div> | ||
| + | ''By Jeroz - Oct 27th, 2018 -- Updated by [https://twitter.com/pathfinder @Pathfinder] for v4.3.2.1'' | ||
| + | |||
| − | |||
== General Introduction == | == General Introduction == | ||
| Line 13: | Line 15: | ||
#https://www.raspberrypi.org/documentation/ | #https://www.raspberrypi.org/documentation/ | ||
#https://medium.com/@meeDamian/bitcoin-full-node-on-rbp3-revised-88bb7c8ef1d1 | #https://medium.com/@meeDamian/bitcoin-full-node-on-rbp3-revised-88bb7c8ef1d1 | ||
| − | |||
== Before you start == | == Before you start == | ||
| Line 36: | Line 37: | ||
#Extract the NOOBS zip file and copy its contents on the memory card. | #Extract the NOOBS zip file and copy its contents on the memory card. | ||
#When this process has finished, safely remove the SD card and insert it into your Raspberry Pi. | #When this process has finished, safely remove the SD card and insert it into your Raspberry Pi. | ||
| − | #Connect the power cable to the Raspberry Pi to let it boot. If you run into trouble, walk | + | #Connect the power cable to the Raspberry Pi to let it boot. If you run into trouble, walk through the [https://www.raspberrypi.org/learning/hardware-guide/ Raspberry Pi hardware guide] |
#If you are using NOOBS and this is the first time your Raspberry Pi and SD card have been used, then you'll have to select an operating system and let it install (Choose the default: Raspbian). | #If you are using NOOBS and this is the first time your Raspberry Pi and SD card have been used, then you'll have to select an operating system and let it install (Choose the default: Raspbian). | ||
#Don't forget to set a password for login when prompted. Otherwise it is too easy for someone else to get in. | #Don't forget to set a password for login when prompted. Otherwise it is too easy for someone else to get in. | ||
| + | |||
| + | == A High-End RPi4 Build with SATA SSD == | ||
| + | (by [https://twitter.com/pathfinder @Pathfinder]) | ||
| + | |||
| + | If you'd like a higher-end hardware setup that's optimized for expandability and speed (microSD cards are notoriously slow), see my [https://bit.ly/smol-guide-rpi4 smol guide]. | ||
| + | <p> | ||
| + | You'll end up building something that looks like this: | ||
| + | <br> | ||
| + | [https://i.gyazo.com/f0eb138514580314976a21a68b8fc68c.jpg <img src="https://i.gyazo.com/f0eb138514580314976a21a68b8fc68c.jpg" width="350">]<br> | ||
| + | |||
| + | My [https://bit.ly/smol-guide-rpi4 smol guide] focuses on running Urbit, but the specified hardware config is also ideal for running a Ravencoin or Bitcoin node! | ||
| + | <p> | ||
| + | |||
| + | For optimal speed and expanadabilty, I suggest using the SATA SSD as the data storage location for the Ravencoin blockchain as well as the Ravencoin binaries. | ||
| + | <p> | ||
| + | Create a directory on the SSD called <b>/media/pi/SSD/Ravencoin</b> and put the directory with the Ravencoin binaries in there. | ||
| + | <p> | ||
| + | Then create a directory on the SSD called <b>/media/pi/SSD/Ravencoin/RavencoinData</b> for the blockchain and reference it like this: | ||
| + | |||
| + | <p> | ||
| + | |||
| + | <b>To START the node:</b> | ||
| + | <pre>./ravend -daemon --datadir=/media/pi/SSD/Ravencoin/RavencoinData</pre> | ||
| + | |||
| + | <b>To STOP the node:</b> | ||
| + | <pre>./raven-cli -datadir=/media/pi/SSD/Ravencoin/RavencoinData stop</pre> | ||
| + | |||
| + | <b>To CHECK the node:</b> | ||
| + | <pre>./raven-cli -datadir=/media/pi/SSD/Ravencoin/RavencoinData -getinfo</pre> | ||
| + | |||
| + | When you're done, it should all look like this: | ||
| + | |||
| + | [https://i.gyazo.com/8c02cd94d8012643c2ce2ec5dc5163f7.jpg <img src="https://i.gyazo.com/8c02cd94d8012643c2ce2ec5dc5163f7.jpg" width="800">] | ||
== Setting up the Ravencoin node - The quick way == | == Setting up the Ravencoin node - The quick way == | ||
| − | Now that you got the OS running, it is time for the fun part: setting up the Ravencoin node | + | Now that you got the OS running, it is time for the fun part: setting up the Ravencoin node. |
| − | # | + | #The Core Ravencoin developers provide binaries for ARM architecture, which are needed for the Raspberry Pi. The latest ravencoin core wallet binaries can be found [https://github.com/RavenProject/Ravencoin/releases here]. For a Pi, you always need a version that has ARM in its name. Open a terminal and use the following commands to get it: |
#:<pre> | #:<pre> | ||
| − | #::cd ~/ wget https://github.com/ | + | #::cd ~/ wget https://github.com/RavenProject/Ravencoin/releases/download/v4.3.2.1/raven-4.3.2.1-arm32v7.zip unzip raven-4.3.2.1-arm32v7.zip cd arm32v7 tar -xvzf raven-4.3.2.1-arm-linux-gnueabihf.tar.gz </pre> |
| − | # | + | # I like to put binaries into my default local user binary location so that I can globally access them from anywhere. |
#:<pre> | #:<pre> | ||
| − | #:: | + | #::sudo cp ./raven-4.3.2.1/bin/* /usr/local/bin </pre> Two files in this directory are important: |
#*''ravend'': which is the Ravencoin deamon, a program that implements the Ravencoin protocol for remote procedure calls (RPCs). In simple terms: it will run a wallet/node as a background process and you can send instructions to it. | #*''ravend'': which is the Ravencoin deamon, a program that implements the Ravencoin protocol for remote procedure calls (RPCs). In simple terms: it will run a wallet/node as a background process and you can send instructions to it. | ||
#*''raven-cli'': which is the command line interface for Ravencoin that you can use to send instructions to ravend. | #*''raven-cli'': which is the command line interface for Ravencoin that you can use to send instructions to ravend. | ||
| Line 54: | Line 88: | ||
#:<pre> | #:<pre> | ||
#::ravend & </pre> | #::ravend & </pre> | ||
| − | #Ravend runs entirely in the background, so you cannot see what is happening. The process will create wallet and blockchain files in <code>~/.raven/</code>. Subsequently, it will start downloading the Ravencoin blockchain. | + | #OPTIONAL: Ravend runs entirely in the background, so you cannot see what is happening. The process will create wallet and blockchain files in <code>~/.raven/</code>. Subsequently, it will start downloading the Ravencoin blockchain. '''Unfortunately, this may take over a week due to the cpu speed of the pi.''' More advanced users may want to copy a pre-verified blockchain (i.e., a bootstrap) from their PC and copy it to their Pi. Make sure to stop ravend first (<code> raven-cli stop</code>) before moving all blockchain files to <code>~/.raven/</code>. |
| − | |||
| − | |||
#Additionally, we are going to make a configuration file to set up ravencoin optimally for the raspberry pi. | #Additionally, we are going to make a configuration file to set up ravencoin optimally for the raspberry pi. | ||
#:<pre> | #:<pre> | ||
#::touch ~/.raven/raven.conf nano ~/.raven/raven.conf </pre> Enter the following lines, and adjust user/login settings accordingly: | #::touch ~/.raven/raven.conf nano ~/.raven/raven.conf </pre> Enter the following lines, and adjust user/login settings accordingly: | ||
| − | #:<pre>rpcuser=rpcuser rpcpassword=SETYOURPASSWORDHERE rpcallowip= | + | #:<pre>rpcuser=rpcuser #optional rpcpassword=SETYOURPASSWORDHERE #optional rpcallowip=127.0.0.1 #optional daemon=1 upnp=1 listen=1 dbcache=800 maxmempool=50 disablewallet=1 logips=1 maxconnections=125 prune=42000 maxuploadtarget=5000 server=1 </pre> '''Note1:''' If you are are planning to only access your node from your pi itself, skip the first 3 optional settings <br /> '''Note2''': Opening up the RPC port to hosts outside your local trusted network is NOT RECOMMENDED, because the rpcpassword is transmitted over the network unencrypted.<br />To save: CTRL+O ENTER, To exit: CTRL+X. |
#Now you can start start ravend again to index the blockchain that you downloaded and to download the remaining bit (which may still take a day depending on your connection). | #Now you can start start ravend again to index the blockchain that you downloaded and to download the remaining bit (which may still take a day depending on your connection). | ||
#:<pre> | #:<pre> | ||
| Line 72: | Line 104: | ||
== Connections and Security == | == Connections and Security == | ||
| − | First, if you are connecting your Pi with the internet | + | First, if you are connecting your Pi with the internet through WIFI (and not an UTP cable), it is important to know that Raspbian power management turns off wifi after a couple of hours idling. Obviously, we don't want that to happen so you need to turn of WIFI power management (and ensure everything is up to date, which seems to have fixed some wifi problems I was having): <pre>sudo apt-get update && sudo apt-get -y dist-upgrade sudo iwconfig wlan0 power off </pre> |
Ok, now that the blockchain is downloading, we are going to work on listening ports (to contribute to the Ravencoin network) and security. | Ok, now that the blockchain is downloading, we are going to work on listening ports (to contribute to the Ravencoin network) and security. | ||
# To make sure the necessary ports are open in your Raspberry Pi: <pre>sudo iptables -A INPUT -p tcp --dport 8767 -j ACCEPT sudo iptables -A INPUT -p udp --dport 8767 -j ACCEPT</pre> | # To make sure the necessary ports are open in your Raspberry Pi: <pre>sudo iptables -A INPUT -p tcp --dport 8767 -j ACCEPT sudo iptables -A INPUT -p udp --dport 8767 -j ACCEPT</pre> | ||
# You also need to set port forwarding in your router. The necessary steps to do this differs per router and therefore I need to refer you to the manual of your router. Be sure to forward the port to the IP address of your Raspberry Pi and the port you are forwarding is 8767. You can find the IP address using the <code>ifconfig</code> command. It is either <code>192.168.X.X</code> or <code>10.0.X.X</code>. | # You also need to set port forwarding in your router. The necessary steps to do this differs per router and therefore I need to refer you to the manual of your router. Be sure to forward the port to the IP address of your Raspberry Pi and the port you are forwarding is 8767. You can find the IP address using the <code>ifconfig</code> command. It is either <code>192.168.X.X</code> or <code>10.0.X.X</code>. | ||
| − | #Next, we are going to install ''Uncomplicated Firewall'' (''ufw''). As mentioned in the introduction: this is highly recommended because you are opening a port to the outside world and you want to make sure it is only used for Ravencoin: <pre>sudo apt install ufw</pre> '''Note:''' ''ufw'' default rules allow for all outgoing connections, but block all incoming connections. <br /><br /> '''Optional:''' If you plan on using SSH to access your raspberry pi, make sure that ssh access is allowed (but limited): <pre>sudo | + | #Next, we are going to install ''Uncomplicated Firewall'' (''ufw''). As mentioned in the introduction: this is highly recommended because you are opening a port to the outside world and you want to make sure it is only used for Ravencoin: <pre>sudo apt-get install ufw</pre> '''Note:''' ''ufw'' default rules allow for all outgoing connections, but block all incoming connections. <br /><br /> '''Optional:''' If you plan on using SSH to access your raspberry pi, make sure that ssh access is allowed (but limited): <pre>sudo ufw limit ssh</pre> '''Optional:''' You might want to add a few more limitations on ssh. For example if you’re planning on accessing your node from local network only. Depending on your local network: <pre>sudo ufw allow from 192.168.1.0/24 to any port 22</pre> Or <pre>sudo ufw allow from 10.0.0.0/24 to any port 22</pre> And/or if you have a dedicated static IP, for example: <pre>sudo ufw allow from 16.32.64.128 to any port 22</pre> |
# To allow Ravencoin traffic: <pre>sudo ufw allow 8767 comment 'Ravencoin'</pre> You can preview the results using: <pre>sudo ufw status verbose Example output: To Action From -- ------ ---- 22/tcp LIMIT IN Anywhere 8767 ALLOW IN Anywhere # Ravencoin 22/tcp (v6) LIMIT IN Anywhere (v6) 8767 (v6) ALLOW IN Anywhere (v6) # Ravencoin </pre> | # To allow Ravencoin traffic: <pre>sudo ufw allow 8767 comment 'Ravencoin'</pre> You can preview the results using: <pre>sudo ufw status verbose Example output: To Action From -- ------ ---- 22/tcp LIMIT IN Anywhere 8767 ALLOW IN Anywhere # Ravencoin 22/tcp (v6) LIMIT IN Anywhere (v6) 8767 (v6) ALLOW IN Anywhere (v6) # Ravencoin </pre> | ||
# Enable Firewall: <pre>sudo ufw enable</pre> | # Enable Firewall: <pre>sudo ufw enable</pre> | ||
| Line 94: | Line 126: | ||
Connections using port:8767 on the left side are incoming connections. | Connections using port:8767 on the left side are incoming connections. | ||
| − | == What do | + | == What to do after a reboot == |
I did not take you through steps that would make the node automatically start when you (re)boot your Raspberry Pi. In the case this does happen, execute the following commands to get everything back up: <pre> sudo iwconfig wlan0 power off ravend & </pre> | I did not take you through steps that would make the node automatically start when you (re)boot your Raspberry Pi. In the case this does happen, execute the following commands to get everything back up: <pre> sudo iwconfig wlan0 power off ravend & </pre> | ||
If you do like to have these commands executed during startup, you can follow the example given [http://thelowercasew.com/disabling-wifi-power-management-permanently-for-raspberry-pi-3-with-raspbian-jessie here], you only need to add an extra line <code>ravend &</code> in step 3. | If you do like to have these commands executed during startup, you can follow the example given [http://thelowercasew.com/disabling-wifi-power-management-permanently-for-raspberry-pi-3-with-raspbian-jessie here], you only need to add an extra line <code>ravend &</code> in step 3. | ||
| Line 101: | Line 133: | ||
And there you go, a full node on a Raspberry Pi! :) | And there you go, a full node on a Raspberry Pi! :) | ||
| − | Thanks to [@]Name#8397 and [@]Mapple#3283 (Discord handles) for giving valuable feedback. And [@]Under#7846 for sharing some thoughts on the static release and configuration settings. | + | Thanks to [@]unclear#0122, [@]Name#8397 and [@]Mapple#3283 (Discord handles) for giving valuable feedback. And [@]Under#7846 for sharing some thoughts on the static release and configuration settings. |
Latest revision as of 11:08, 19 April 2021

By [@]Pathfinder#0001
By Jeroz - Oct 27th, 2018 -- Updated by @Pathfinder for v4.3.2.1
Contents
General Introduction
I will walk you through the steps to set up a full Ravencoin node on a Raspberry Pi running within your home network. A Raspberry Pi node is one of the cheapest options for a Ravencoin node (under $75) and consumes around 3 Watt when running the node and no peripherals are attached to it. The guide runs you through buying and installing hardware, setting up the operating system (using NOOBS), installing the node, and setting up security. Setting up security is highly recommended because you are opening a port to the outside world and you want to make sure it is only used for Ravencoin. Also, as there is no working Raspberry Pi graphical user interface for the Raven Core wallet, you will have to set it up through commands in the terminal. For each step, I will try to explain what you are doing and provide command lines that you need to execute. I will provide links that 1) don't require you to compile the node (which takes about 2 hours if it doesn't crash halfway), and 2) a direct download of 1.8GB of the blockchain, so you don't have to download it from other nodes in the network. These steps likely save you days in getting the node up and running.
My resources for setting up this guide were my previous experiences in working with Bash (linux command line language) and:
- https://www.raspberrypi.org/documentation/
- https://medium.com/@meeDamian/bitcoin-full-node-on-rbp3-revised-88bb7c8ef1d1
Before you start
Before you start, you will need:
- A working internet connection; via an UTP cable (recommended for connection stability) or WIFI.
- A PC with an SD card reader
- A Mouse, keyboard, and monitor
Raspberry Pi hardware
My Pi hardware:
- $54.99, Canakit Raspberry Pi 3 B+ (Pi + Case + heat sinks + power cable)
My reasoning for this option: I rather have everything in 1 go. - $15.20, 64 GB Samsung 64GB MicroSDXC EVO Plus Memory Card.
Obviously I forgot to buy this initially (oops...)
My reasoning for this option: I chose 64GB instead of 32 to have enough room for the future.
Note: formatting a 64GB (or larger) card takes extra steps, see below
Setting up Pi hardware and OS software
- Follow the instructions that shipped with the Raspberry Pi to build it.
- Download the OS Zip file (NOOBS for beginners).
- The Raspberry Pi only reads FAT32 formatted partitions on the SD card. So you will need to format it using SD Memory Card Formatter
Note: If your SD card is 64GB (or larger), it will automatically be formatted as exFAT, which is not compatible with NOOBS. You need to force your SD card to format as FAT32 to use NOOBS[1].- Linux and Mac OS: The standard formatting tools built into these operating systems are able to create FAT32 partitions; they might also be labeled as FAT or MS-DOS. Simply delete the existing exFAT partition and create and format a new FAT32 primary partition.
- Windows: The standard formatting tools built into Windows are limited, as they only allow partitions up to 32GB to be formatted as FAT32, so to format a 64GB partition as FAT32 you need to use a third-party formatting tool. A simple tool to do this is FAT32 Format.
- Extract the NOOBS zip file and copy its contents on the memory card.
- When this process has finished, safely remove the SD card and insert it into your Raspberry Pi.
- Connect the power cable to the Raspberry Pi to let it boot. If you run into trouble, walk through the Raspberry Pi hardware guide
- If you are using NOOBS and this is the first time your Raspberry Pi and SD card have been used, then you'll have to select an operating system and let it install (Choose the default: Raspbian).
- Don't forget to set a password for login when prompted. Otherwise it is too easy for someone else to get in.
A High-End RPi4 Build with SATA SSD
(by @Pathfinder)
If you'd like a higher-end hardware setup that's optimized for expandability and speed (microSD cards are notoriously slow), see my smol guide.
You'll end up building something that looks like this:
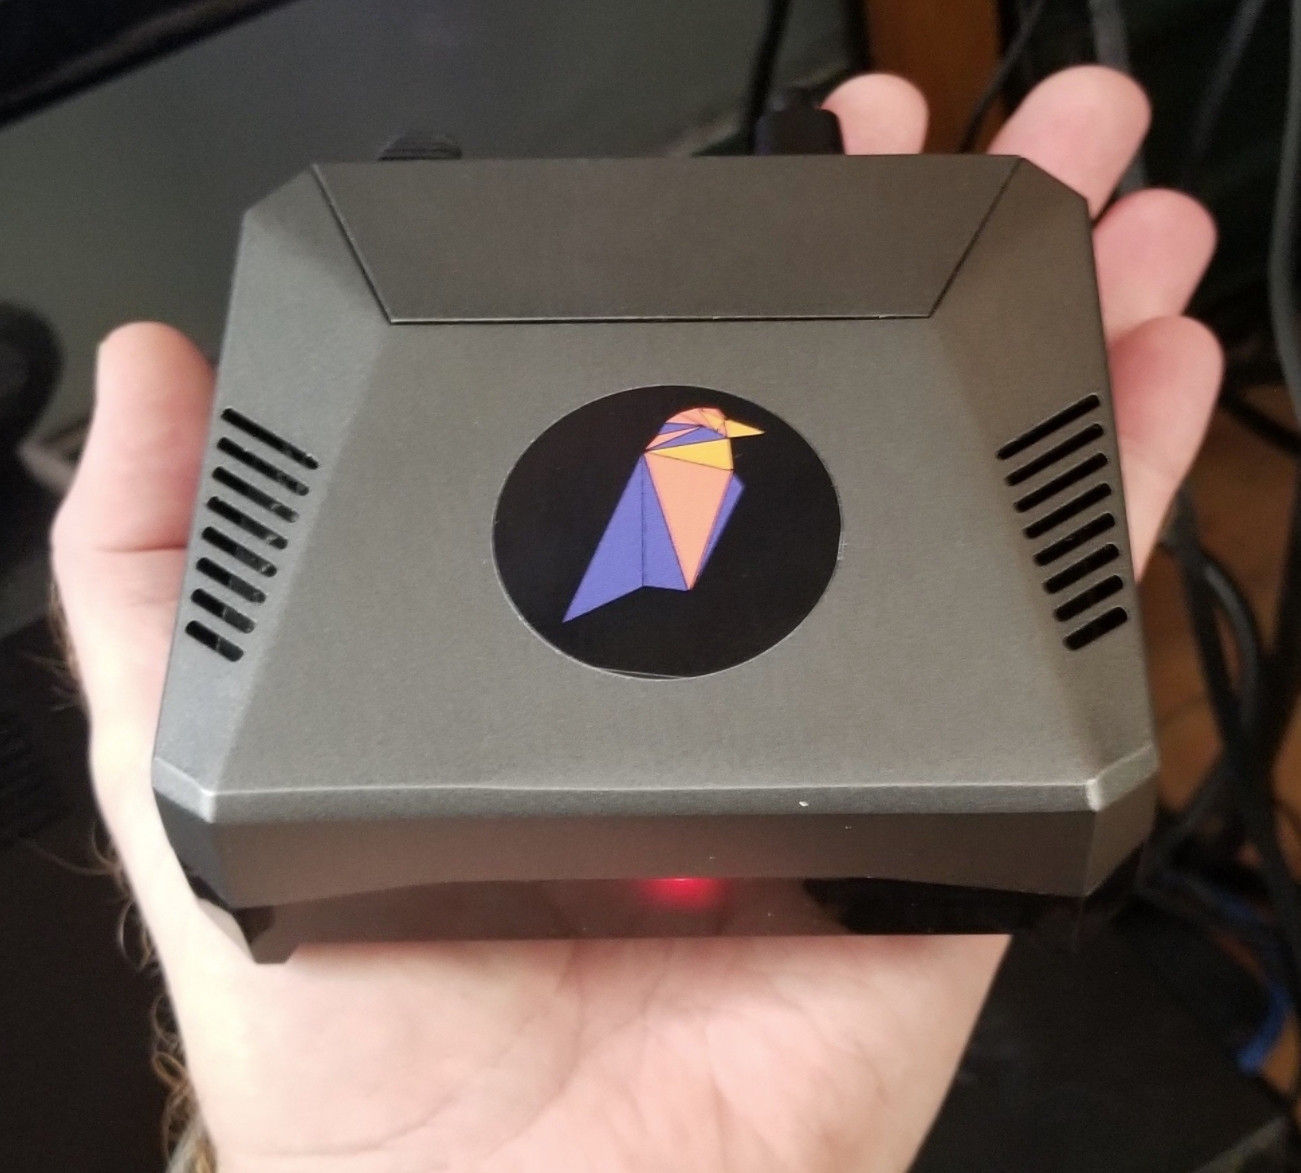
My smol guide focuses on running Urbit, but the specified hardware config is also ideal for running a Ravencoin or Bitcoin node!
For optimal speed and expanadabilty, I suggest using the SATA SSD as the data storage location for the Ravencoin blockchain as well as the Ravencoin binaries.
Create a directory on the SSD called /media/pi/SSD/Ravencoin and put the directory with the Ravencoin binaries in there.
Then create a directory on the SSD called /media/pi/SSD/Ravencoin/RavencoinData for the blockchain and reference it like this:
To START the node:
./ravend -daemon --datadir=/media/pi/SSD/Ravencoin/RavencoinData
To STOP the node:
./raven-cli -datadir=/media/pi/SSD/Ravencoin/RavencoinData stop
To CHECK the node:
./raven-cli -datadir=/media/pi/SSD/Ravencoin/RavencoinData -getinfo
When you're done, it should all look like this:
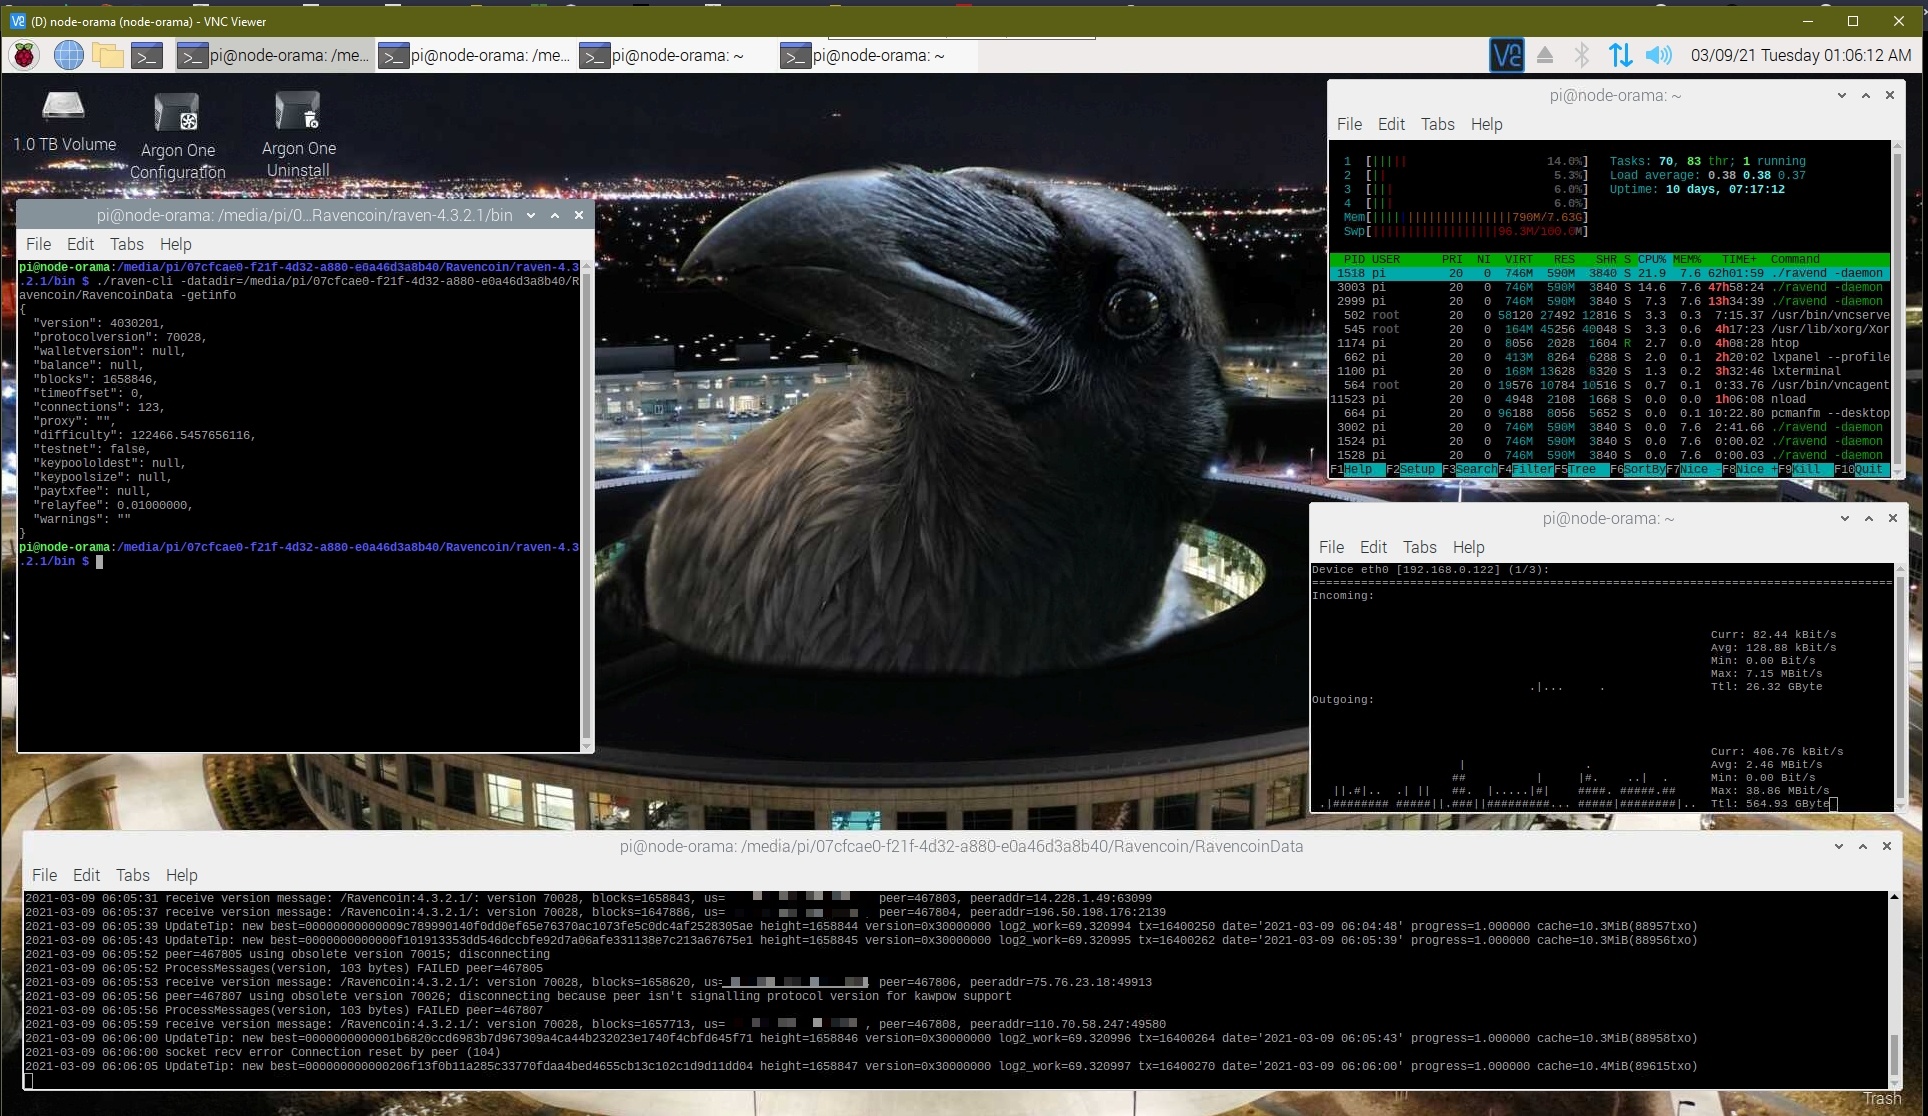
Setting up the Ravencoin node - The quick way
Now that you got the OS running, it is time for the fun part: setting up the Ravencoin node.
- The Core Ravencoin developers provide binaries for ARM architecture, which are needed for the Raspberry Pi. The latest ravencoin core wallet binaries can be found here. For a Pi, you always need a version that has ARM in its name. Open a terminal and use the following commands to get it:
- cd ~/ wget https://github.com/RavenProject/Ravencoin/releases/download/v4.3.2.1/raven-4.3.2.1-arm32v7.zip unzip raven-4.3.2.1-arm32v7.zip cd arm32v7 tar -xvzf raven-4.3.2.1-arm-linux-gnueabihf.tar.gz
- I like to put binaries into my default local user binary location so that I can globally access them from anywhere.
- sudo cp ./raven-4.3.2.1/bin/* /usr/local/bin
- ravend: which is the Ravencoin deamon, a program that implements the Ravencoin protocol for remote procedure calls (RPCs). In simple terms: it will run a wallet/node as a background process and you can send instructions to it.
- raven-cli: which is the command line interface for Ravencoin that you can use to send instructions to ravend.
- Next up is starting the deamon (ravend) process to start the Ravencoin node.
- ravend &
- OPTIONAL: Ravend runs entirely in the background, so you cannot see what is happening. The process will create wallet and blockchain files in
~/.raven/. Subsequently, it will start downloading the Ravencoin blockchain. Unfortunately, this may take over a week due to the cpu speed of the pi. More advanced users may want to copy a pre-verified blockchain (i.e., a bootstrap) from their PC and copy it to their Pi. Make sure to stop ravend first (raven-cli stop) before moving all blockchain files to~/.raven/. - Additionally, we are going to make a configuration file to set up ravencoin optimally for the raspberry pi.
- touch ~/.raven/raven.conf nano ~/.raven/raven.conf
rpcuser=rpcuser #optional
rpcpassword=SETYOURPASSWORDHERE #optional
rpcallowip=127.0.0.1 #optional
daemon=1
upnp=1
listen=1
dbcache=800
maxmempool=50
disablewallet=1
logips=1
maxconnections=125
prune=42000
maxuploadtarget=5000
server=1
Note1: If you are are planning to only access your node from your pi itself, skip the first 3 optional settings
Note2: Opening up the RPC port to hosts outside your local trusted network is NOT RECOMMENDED, because the rpcpassword is transmitted over the network unencrypted.
To save: CTRL+O ENTER, To exit: CTRL+X. - Now you can start start ravend again to index the blockchain that you downloaded and to download the remaining bit (which may still take a day depending on your connection).
- ravend &
- Ok, so suppose you are as impatient as I am and you want to know more about the progress of ravend downloading the block chain. To make this insightful we are going to make use of a little script that I found using google and slightly adapted (original creator). It will use raven-cli to get information from the deamon and we will extract the most useful information from it.
- touch ~/check_status.sh nano ~/check_status.sh
#!/bin/bash
count=$(/usr/local/bin/raven-cli getblockcount);
/bin/echo "block count: $count";
hash=$(/usr/local/bin/raven-cli getblockhash $count);
/bin/echo "block hash: $hash";
t=$(/usr/local/bin/raven-cli getblock "$hash" | grep '"time"' | awk '{print $2}' | sed -e 's/,$//g');
/bin/echo "block timestamp is: $t";
cur_t=$(date +%s);
diff_t=$[$cur_t - $t];
/bin/echo -n "Difference is: ";
/bin/echo $diff_t | /usr/bin/awk '{printf "%d days, %d:%d:%d\n",$1/(60*60*24),$1/(60*60)%24,$1%(60*60)/60,$1%60}';
To save: CTRL+O ENTER, To exit: CTRL+X.
And to make it executable:chmod +x ~/check_status.sh
You can now use the script to check the blockchain download status of ravend. I noticed that it spits out an error if ravend is still indexing the blockchain (after startup) and that the first call to it is rather slow:~/check_status.sh
Connections and Security
First, if you are connecting your Pi with the internet through WIFI (and not an UTP cable), it is important to know that Raspbian power management turns off wifi after a couple of hours idling. Obviously, we don't want that to happen so you need to turn of WIFI power management (and ensure everything is up to date, which seems to have fixed some wifi problems I was having):
sudo apt-get update && sudo apt-get -y dist-upgrade
sudo iwconfig wlan0 power off
Ok, now that the blockchain is downloading, we are going to work on listening ports (to contribute to the Ravencoin network) and security.
- To make sure the necessary ports are open in your Raspberry Pi:
sudo iptables -A INPUT -p tcp --dport 8767 -j ACCEPT
sudo iptables -A INPUT -p udp --dport 8767 -j ACCEPT
- You also need to set port forwarding in your router. The necessary steps to do this differs per router and therefore I need to refer you to the manual of your router. Be sure to forward the port to the IP address of your Raspberry Pi and the port you are forwarding is 8767. You can find the IP address using the
ifconfigcommand. It is either192.168.X.Xor10.0.X.X. - Next, we are going to install Uncomplicated Firewall (ufw). As mentioned in the introduction: this is highly recommended because you are opening a port to the outside world and you want to make sure it is only used for Ravencoin:
sudo apt-get install ufw
Note: ufw default rules allow for all outgoing connections, but block all incoming connections.
Optional: If you plan on using SSH to access your raspberry pi, make sure that ssh access is allowed (but limited):sudo ufw limit ssh
Optional: You might want to add a few more limitations on ssh. For example if you’re planning on accessing your node from local network only. Depending on your local network:sudo ufw allow from 192.168.1.0/24 to any port 22
Orsudo ufw allow from 10.0.0.0/24 to any port 22
And/or if you have a dedicated static IP, for example:sudo ufw allow from 16.32.64.128 to any port 22
- To allow Ravencoin traffic:
sudo ufw allow 8767 comment 'Ravencoin'
You can preview the results using:sudo ufw status verbose Example output: To Action From -- ------ ---- 22/tcp LIMIT IN Anywhere 8767 ALLOW IN Anywhere # Ravencoin 22/tcp (v6) LIMIT IN Anywhere (v6) 8767 (v6) ALLOW IN Anywhere (v6) # Ravencoin
- Enable Firewall:
sudo ufw enable
- To make it a bit more difficult for someone trying to brute force his way in. We are going to give timeouts when the login password was wrong 5 times using Fail2Ban:
sudo apt install fail2ban
To see the banlist:sudo fail2ban-client status Example output: Status|- Number of jail: 1 `- Jail list: sshd
Final checks
Ok, time for final checks to make sure peers can connect to you. To see if the port is working you can enter your public IP address and port 8767 at https://ping.eu/port-chk/ .
You can also connect to your node using a wallet on a different pc. In raven core, go to: help>debug window>console and type:
addnode YOUR_PUBLIC_IP:8767 add
On your Raspberry Pi you can check whether you see incoming connections:
netstat | grep :8767
Output example:
tcp  0  0 10.0.0.137:60954  ec2-18-202-73-87.e:8767 ESTABLISHED
tcp  0  0 10.0.0.137:8767   185.212.171.218:54128   ESTABLISHED
tcp  0  0 10.0.0.137:59318  ec2-34-250-168-91.:8767 ESTABLISHED
tcp  0  0 10.0.0.137:33302  pool-71-121-144-13:8767 ESTABLISHED
tcp  0  0 10.0.0.137:8767   62-165-213-161.po:58887 ESTABLISHED
tcp  0  0 10.0.0.137:47502  075-177-011-096.re:8767 ESTABLISHED
tcp  0  0 10.0.0.137:44608  ec2-52-26-83-116.u:8767 ESTABLISHED
tcp  0  0 10.0.0.137:58040  ecs-114-115-175-41:8767 ESTABLISHED
tcp  0  0 10.0.0.137:58112  c-73-37-220-84.hsd:8767 ESTABLISHED
Connections using port:8767 on the left side are incoming connections.
What to do after a reboot
I did not take you through steps that would make the node automatically start when you (re)boot your Raspberry Pi. In the case this does happen, execute the following commands to get everything back up:
 sudo iwconfig wlan0 power off
 ravend &
If you do like to have these commands executed during startup, you can follow the example given here, you only need to add an extra line ravend & in step 3.
And there you go, a full node on a Raspberry Pi! :)
Thanks to [@]unclear#0122, [@]Name#8397 and [@]Mapple#3283 (Discord handles) for giving valuable feedback. And [@]Under#7846 for sharing some thoughts on the static release and configuration settings.